 Molvi
Molvi
Installing Molvi
Five steps, 5–10 minutes including the model download. Every screen tells you what to pick and why.
Download the installer
Click the button — it opens the latest release page on GitHub. Download the Molvi-Setup-…exe file (about 70 MB) from the "Assets" section.
Molvi is open source, and GitHub is its official and only source. Installers from anywhere else could be fakes.
Get past the Windows warning
When you launch the installer, Windows shows a blue "Windows protected your PC" screen. That's expected:
- click "More info";
- then the "Run anyway" button that appears.
Windows protected your PC
Windows Defender SmartScreen prevented an unrecognized app from starting. Running this app might put your PC at risk.
More infoThis is what the SmartScreen dialog looks like (illustration).
Windows trusts apps with a paid code-signing certificate (several hundred dollars a year). Molvi is free and doesn't have one, so SmartScreen plays it safe. Molvi's code is open — anyone can check what's inside.
Go through the installer
The first screen suggests an install folder — just click "Next". Then you'll choose additional tasks:
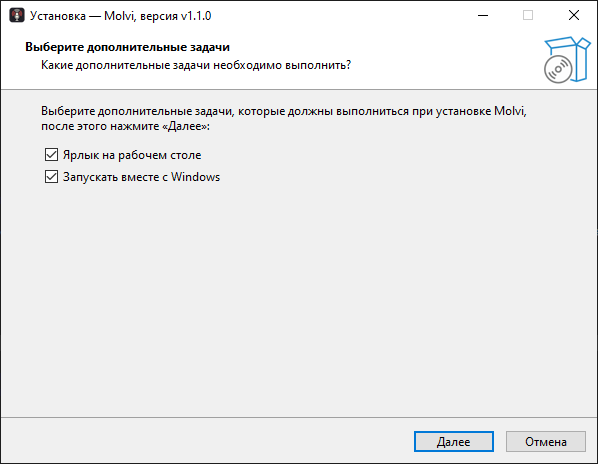
- RecommendedLaunch at Windows startup — Molvi lives in the tray and barely uses any resources while you're not dictating. With autostart, dictation is always at hand; without it, you'd have to launch Molvi manually.
- OptionalDesktop shortcut — only needed for launching manually. If you enabled autostart, you can uncheck it.
Next, click "Next" → "Install". At the end, leave the "Launch Molvi" checkbox on and click "Finish".
Go through the first-run wizard
On first launch, Molvi walks you through setup itself — six short screens.
4.1. Welcome
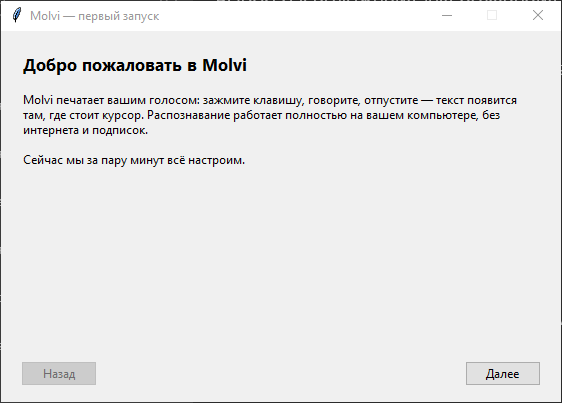
Just click "Next".
4.2. Hardware and quality
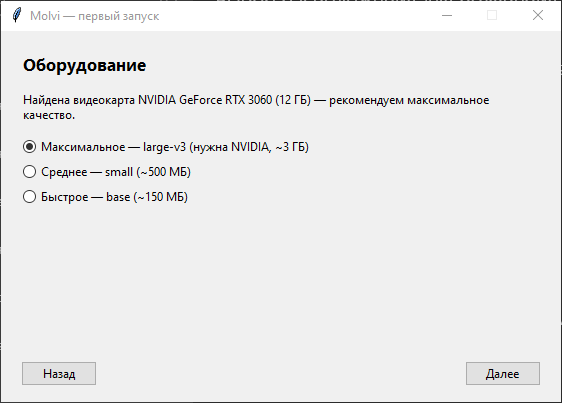
The wizard detected your GPU on its own and pre-selected the recommended option.
- NVIDIA 6+ GBMaximum — large-v3 — the best quality, dictation is recognized almost without errors. Requires an NVIDIA GPU with 6+ GB of VRAM; ~3 GB download.
- No NVIDIAFast — base — works on any CPU and downloads in about a minute (~150 MB). Lower quality, but plenty for short phrases.
- Trade-offMedium — small — noticeably more accurate than base on CPU, but slower too (~500 MB).
The large-v3 model on a CPU takes several minutes to recognize a minute of speech — that's unworkable, so without a suitable GPU the wizard suggests a fast model. You can always change the quality later in Settings.
4.3. Downloading components
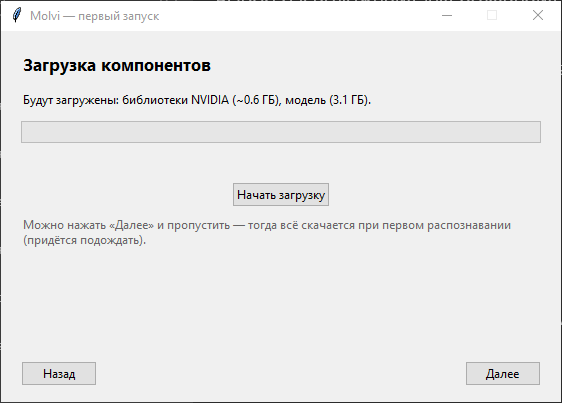
Click "Start download" and wait for the "Done!" message.
What exactly gets downloaded — only open components from official sources:
- Speech recognition model — faster-whisper by Systran
(a conversion of OpenAI's open Whisper model), downloaded from Hugging Face
depending on the quality you chose:
large-v3 (~3 GB),
small (~500 MB) or
base (~150 MB).
Saved to the Hugging Face cache:
%USERPROFILE%\.cache\huggingface - NVIDIA libraries (only if a suitable GPU is present) —
the official
cuBLAS and
cuDNN packages from PyPI
(~0.6 GB total) — GPU recognition runs on them.
Extracted to
%APPDATA%\Molvi\cuda
You can skip it — but then everything downloads on your first dictation, and the first phrase will "hang" for a few minutes. It's more convenient to wait once now.
4.4. Microphone
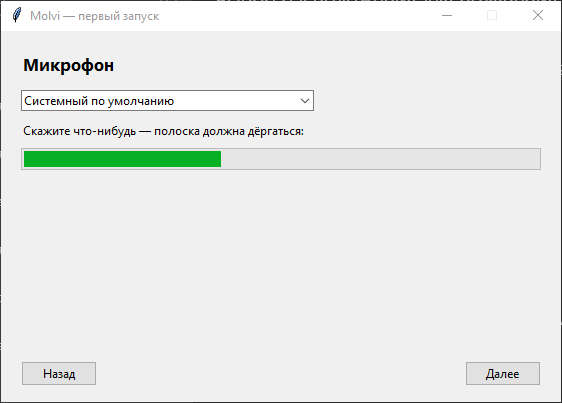
Say something — the bar should move.
- the bar moves — leave "System default" and move on;
- the bar stays still — pick a different microphone from the list and check again.
4.5. Dictation key
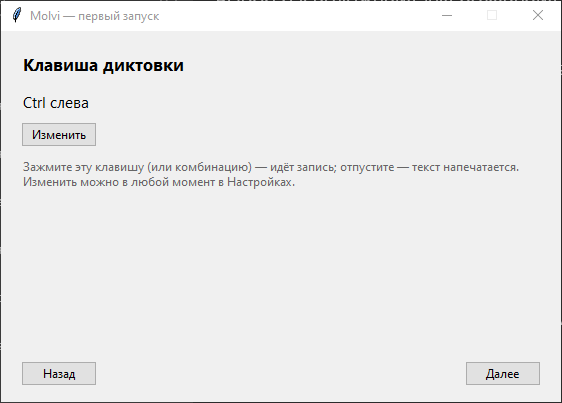
Left Ctrl by default: hold it, speak, release it.
Left Ctrl is convenient: it's always under your pinky, and Molvi ignores brief accidental presses (like Ctrl+C) — a recording that's too short is simply discarded. If Ctrl still gets in your way, click "Change" and hold your own combination, for example Ctrl + Shift.
4.6. Done
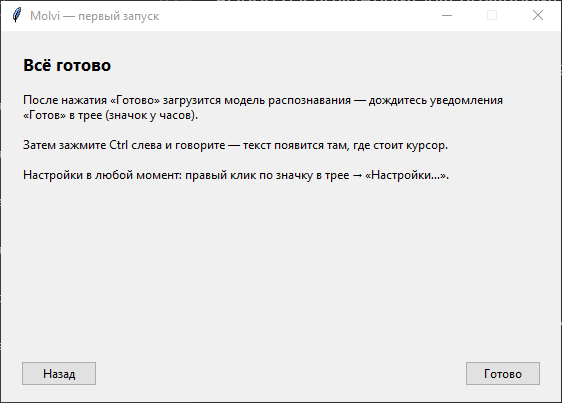
After "Finish," the model loads into memory — wait for the "Ready" notification near the clock (10–30 seconds).
Dictate your first phrase
- place your cursor in any text field — Notepad, a browser, a messenger;
- hold Ctrl — a "Recording…" pill appears;
- say: "Hi! This is Molvi typing with my voice";
- release the key — within a second or two, the text appears at your cursor.
Right-click the Molvi tray icon → "Settings…": key, microphone, language, model quality, sounds, autostart.
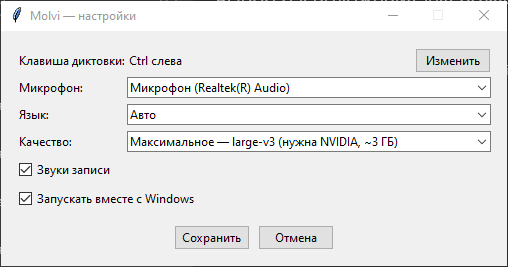
The settings window — everything from the wizard, in one place.
If something went wrong
Recognition is slow
It's likely running on the CPU instead of the GPU. Open the log
%APPDATA%\Molvi\molvi.log and find the line "Model loaded,
device: …" — it should say cuda. If it says cpu —
choose "Fast" quality in Settings, or check that you have an NVIDIA GPU
with 6+ GB of VRAM and an up-to-date driver.
Text doesn't appear
Check your microphone: in the log, after "Recording … s" a line reading "Recognized 0 characters" means the microphone is silent. Open Settings and choose a different recording device. Also make sure your cursor is in a text field — Molvi types wherever the cursor is.
My antivirus flags the installer
Same reason as SmartScreen: no paid code-signing certificate. Molvi's code is open — builds happen publicly on GitHub from source, and every release can be checked against the code. Add Molvi to your exclusions.
The tray icon is gone / nothing works
Check the hidden icons (the "^" arrow near the clock) — Windows
likes to hide new icons. If Molvi really isn't running, launch it from the
shortcut and check the log %APPDATA%\Molvi\molvi.log —
it'll show the reason if there's an error. Still stuck? —
open an issue.
Did Molvi help? Support the project
Molvi is free and has no telemetry. A donation helps ship updates.
Payments via Tribute · one-time or monthly